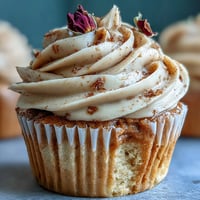
 Pin it
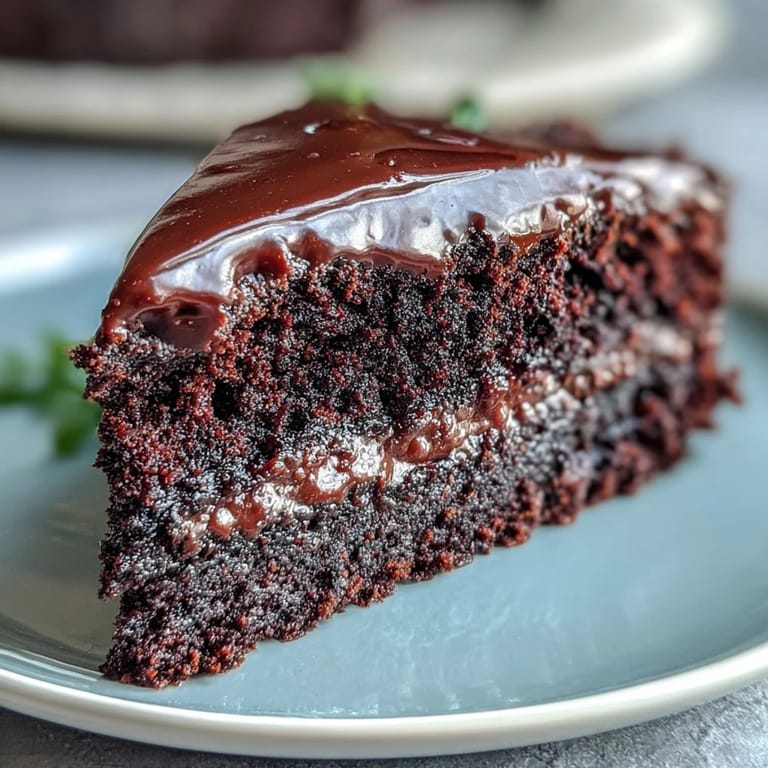
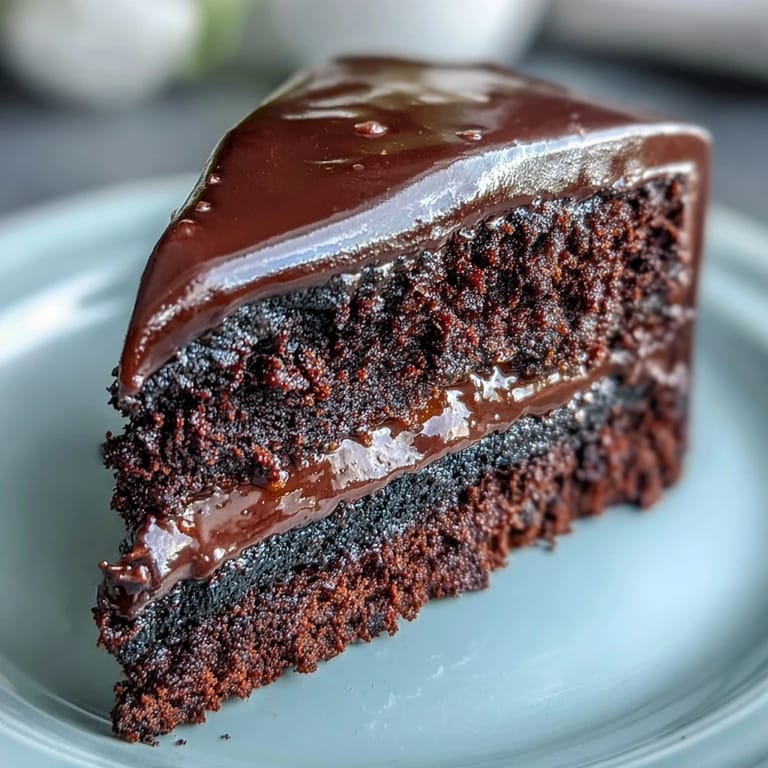
 There was chocolate smeared on the counter, cocoa powder dusting my apron, and the kitchen smelled like warmth itself. I wasn't trying to impress anyone that afternoon, just craving something deep and fudgy that didn't require fancy technique. This cake came together in under an hour, and when I pulled those tins from the oven, the tops cracked just slightly, promising that squidgy center I'd been after. It's been my go-to ever since.
I made this for my neighbor's birthday once, nervously carrying it across the street with the icing barely set. She cut into it at the table, and everyone went quiet for a moment, just tasting. Someone said it reminded them of their grandmother's kitchen, and I realized then that chocolate cake is never just cake. It's comfort, it's celebration, it's the thing that makes people lean back in their chairs and sigh happily.
Ingredients
- Unsalted butter (200 g, plus extra for greasing): The butter adds richness and helps create that tender crumb, and because we're using dark chocolate, unsalted keeps the sweetness balanced.
- Dark chocolate (200 g, minimum 50% cocoa solids), chopped: This is the soul of the cake, so use chocolate you'd actually enjoy eating on its own, nothing waxy or too bitter.
- Light brown sugar (250 g): The molasses in brown sugar gives a deeper, almost caramel-like sweetness that white sugar just can't match.
- Large eggs (3): They bind everything together and give the cake structure, so make sure they're at room temperature for easier whisking.
- Plain flour (200 g): Just enough to hold the batter without making it cakey, we want fudgy, not fluffy.
- Baking powder (1 ½ tsp): A gentle lift, not a dramatic rise, keeping the texture dense and moist.
- Fine sea salt (¼ tsp): It sharpens the chocolate flavor and keeps the sweetness from being cloying.
- Cocoa powder (50 g): Adds an extra layer of chocolate intensity and that beautiful dark color.
- Whole milk (150 ml): Loosens the batter just enough to make it pourable and keeps the crumb soft for days.
- Vanilla extract (1 tsp): A subtle background note that makes the chocolate taste more like itself.
- Dark chocolate for icing (150 g), chopped: Same quality rule applies here, good chocolate makes silky, glossy icing.
- Unsalted butter for icing (100 g): Gives the icing that spreadable, luxurious texture.
- Icing sugar (200 g), sifted: Sifting is non-negotiable unless you want lumpy icing, I learned that the hard way.
- Whole milk for icing (3 tbsp): Just enough to loosen the icing to spreading consistency without making it runny.
Tired of Takeout? 🥡
Get 10 meals you can make faster than delivery arrives. Seriously.
One email. No spam. Unsubscribe anytime.
Instructions
- Preheat and Prepare:
- Set your oven to 180°C (160°C fan) or 350°F, and grease two 20 cm round cake tins, lining the bottoms with baking paper. This bit of prep saves you from heartbreak later when the cakes stick.
- Melt the Chocolate and Butter:
- Place the butter and chopped chocolate in a heatproof bowl over a pan of gently simmering water, stirring now and then until everything melts into a glossy pool. Let it cool slightly so it doesn't scramble the eggs.
- Whisk the Sugar and Eggs:
- In a large bowl, whisk the sugar and eggs together until the mixture turns pale and thick, almost mousse-like. This takes a few minutes by hand, less if you're using an electric whisk.
- Combine Chocolate and Eggs:
- Stir the melted chocolate mixture into the whisked eggs, folding gently, then add the vanilla extract. The batter will look glossy and smell incredible.
- Sift the Dry Ingredients:
- In a separate bowl, sift together the flour, baking powder, salt, and cocoa powder. Sifting matters here, it prevents lumps and makes folding easier.
- Fold and Add Milk:
- Gradually fold the dry ingredients into the wet mixture, alternating with splashes of milk, until just combined and smooth. Don't overmix or the cake will toughen.
- Divide and Bake:
- Divide the batter evenly between the two prepared tins and smooth the tops. Bake for 30 to 35 minutes, until a skewer inserted into the center comes out with a few moist crumbs clinging to it.
- Cool the Cakes:
- Let the cakes cool in their tins for 10 minutes, then turn them out onto a wire rack to cool completely. Icing a warm cake is a recipe for disaster.
- Make the Icing:
- Melt the chocolate and butter together over simmering water, then remove from heat. Gradually beat in the sifted icing sugar and milk until the icing is smooth and glossy.
- Assemble and Ice:
- Place one cake layer on a serving plate and spread a third of the icing over the top. Set the second layer on top, then cover the top and sides with the remaining icing, smoothing with a palette knife.
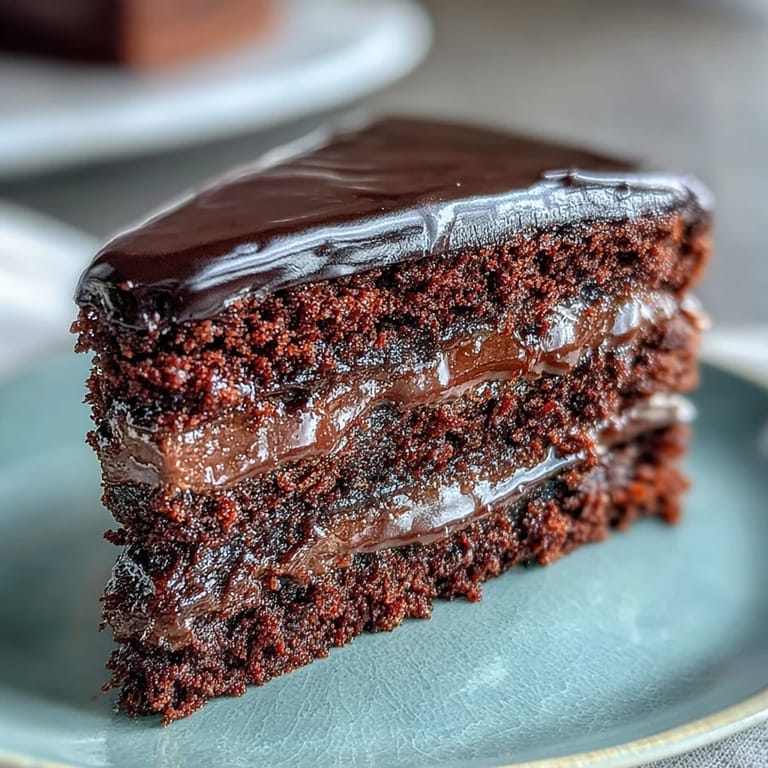 Pin it
 I remember slicing into this cake on a rainy Tuesday, just because. The first bite was all soft crumb and rich chocolate, and suddenly the gray afternoon felt a bit brighter. It's funny how a homemade cake can do that, turn an ordinary moment into something worth savoring. This one's become my answer to bad days, good days, and every kind of day in between.
Storing and Keeping
This cake keeps beautifully in an airtight container at room temperature for up to three days, though it rarely lasts that long in my house. The icing firms up slightly after a day, making it easier to slice cleanly, and the flavors deepen as the chocolate settles. If you need to store it longer, wrap it well and refrigerate it, but let it come to room temperature before serving so the texture softens back to that perfect fudgy state.
Serving Suggestions
I love serving this with a dollop of lightly whipped cream on the side, the slight tanginess cuts through the richness in the best way. Fresh raspberries or strawberries scattered on top add a pop of color and a hint of tartness that makes each bite feel a bit lighter. For an extra indulgent touch, spread a thin layer of raspberry jam between the cake layers before icing, it's a small addition that makes people ask what your secret is.
What You'll Need
You don't need a fancy kitchen for this cake, just two 20 cm round cake tins, a couple of mixing bowls, and a whisk. A heatproof bowl and a saucepan for the bain-marie method work perfectly for melting chocolate without burning it. A palette knife or offset spatula makes icing the cake much easier, though a regular butter knife will do in a pinch.
- Make sure your cake tins are properly greased and lined, or you'll be prying cake pieces out in frustration.
- An electric whisk speeds things up, but a hand whisk works just fine if you've got a bit of arm strength.
- A wire rack is essential for cooling the cakes evenly and preventing soggy bottoms.
 Pin it
 This cake has earned its place in my kitchen, not because it's complicated or clever, but because it delivers every single time. Make it once, and you'll understand why it's the one I reach for when chocolate is the only answer.
Recipe FAQs
- → Can I use milk chocolate instead of dark chocolate?
Yes, but dark chocolate with minimum 50% cocoa solids gives the best rich, fudgy flavor. Milk chocolate will make it sweeter and less intense.
- → Why is my cake dry instead of squidgy?
Overbaking is usually the culprit. Remove the cake when a skewer comes out with a few moist crumbs, not completely clean. Also ensure accurate oven temperature.
- → Can I make this cake in advance?
Absolutely. The cake layers can be baked a day ahead and stored wrapped in cling film. Ice on the day of serving for best results. Fully iced, it keeps for 3 days.
- → What can I use instead of whole milk?
Semi-skimmed milk works fine, though whole milk gives a richer result. For dairy-free, use oat or almond milk and substitute dairy-free chocolate and butter alternatives.
- → How do I get a smooth icing finish?
Ensure your icing is at spreadable consistency—not too thick or runny. Use a warmed palette knife and smooth in long, even strokes. A final pass with a hot knife creates a professional finish.
- → Can I freeze this chocolate cake?
Yes. Wrap un-iced cake layers tightly in cling film and foil, then freeze for up to 3 months. Thaw completely at room temperature before icing and serving.