 Pin it
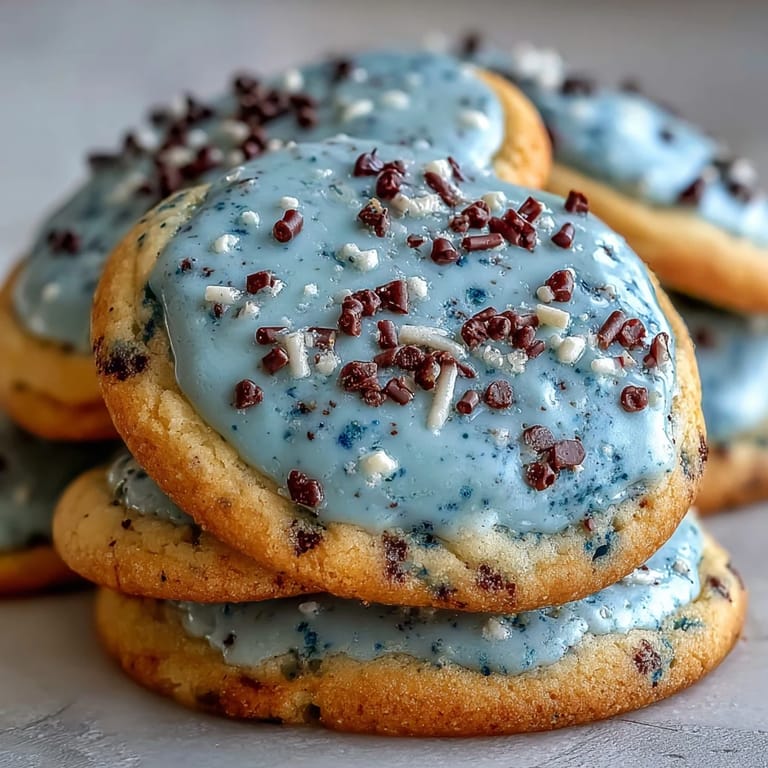
 The first time I made these robin's egg cookies was after spotting a flock of birds darting between the budding dogwood trees outside my kitchen window. That blue—both delicate and lively—was all the inspiration I needed for a batch of spring treats. On that blustery afternoon, the kitchen filled with buttery scents and the occasional mutter as I attempted my first speckled icing. Watching the cookie dough soften in my hands, I couldn't help but imagine sharing them at a garden party, even if that party was just me and my coffee. There's a quiet joy in creating something pretty, especially when the colors echo the season blooming outdoors.
I distinctly remember the time my niece helped me cut out cookie shapes; her giggle every time the dough stuck to the cutter made the process lighthearted and fun. We decorated the table with bowls of icing, and by the end, our hands were just as blue as the robin's eggs. Every step felt like a mini discovery—especially learning that cocoa speckles would splash everywhere if you aimed the brush too high. Moments like those remind me that baking is less about perfection and more about laughter and shared messes. It's often the cookies with crooked edges and wild speckles that get eaten first.
Ingredients
- All-purpose flour: Gives the cookies their classic tender bite—be sure to measure precisely, or they'll turn out dense.
- Baking powder: Helps the cookies puff gently; I've learned not to overdo it, or shapes lose definition.
- Fine salt: Just a pinch balances the sweetness and makes other flavors pop.
- Unsalted butter: Softened butter whips up fluffy and ensures an even, buttery flavor throughout.
- Granulated sugar: Always best creamed fully for crisp edges—don't rush this step.
- Egg: Binds everything neatly together for cookies that don't crumble.
- Pure vanilla extract: Real vanilla lends depth; I sometimes sneak in an extra splash.
- Almond extract (optional): A subtle floral twist; use sparingly or omit if you prefer classic vanilla.
- Blue gel food coloring: Gel color stays vibrant without making the dough runny; go slow, the blue intensifies quickly.
- Powdered sugar: For smooth, glossy icing that sets beautifully.
- Milk: Adjusts icing consistency; add in small increments for the perfect spread.
- Light corn syrup: Makes the icing shiny and helps it set firm.
- Cocoa powder: Unsweetened gives the classic speckle look; sift it so you don’t get clumps.
- Vanilla extract (for speckling): A hint rounds out the speckling flavor if you’re tasting the decoration.
- Water: Just enough to thin the cocoa for flicking—too much and the speckles pool.
Tired of Takeout? 🥡
Get 10 meals you can make faster than delivery arrives. Seriously.
One email. No spam. Unsubscribe anytime.
Instructions
- Prep your dry mix:
- Whisk flour, baking powder, and salt until you see no streaks; the scent of flour and salt rising together reminds me baking is real chemistry.
- Cream the butter and sugar:
- Start slow, building up speed until the butter turns almost pale; the mixer hum and flecks of sugar on the bowl signal it's getting fluffy.
- Add egg and extracts:
- Pour in egg, vanilla, and almond, then mix just until the dough feels smooth and smells gently floral.
- Fold in the dry:
- Tip in the flour blend in small batches; the dough comes together soft but not sticky—resist the urge to knead.
- Tint and chill:
- Drop in gel coloring and mix gently; watch for a pale blue, then shape discs, wrap, and chill—the dough firms up and is easier to roll.
- Roll and cut shapes:
- Dust your surface, roll dough to about 1/4 inch, then cut egg shapes; the soft blue discs always look inviting before baking.
- Bake:
- Space cookies on lined sheets and bake until the edges are just set; the kitchen fills with buttery sweetness, signaling they're done.
- Cool and prepare icing:
- Mix powdered sugar, milk, corn syrup, and vanilla until glossy; tint pale blue and let set up slightly while cookies cool.
- Ice the cookies:
- Spread or pipe icing, enjoying the shine; give them at least 15 minutes to set so speckling won't run.
- Speckle:
- Mix cocoa, water, and vanilla; flick a stiff brush over cookies for natural-looking speckles—protect your counter, you'll thank yourself later.
- Finish and store:
- Let cookies dry thoroughly before stacking or serving; admire your handiwork, then store airtight.
 Pin it
 One spring afternoon, an impromptu cookie swap turned these robin's egg beauties into the centerpiece; everyone admired their playful look, and they disappeared faster than any cupcake or pie. Seeing them brighten the dessert table made me realize it's not just the flavor, but the cheerful touch that makes them memorable.
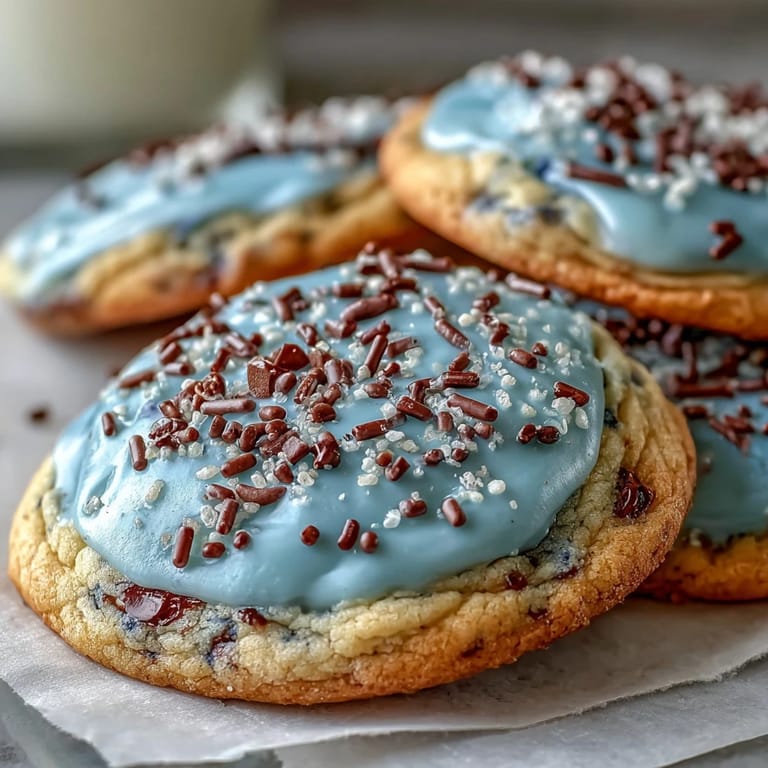
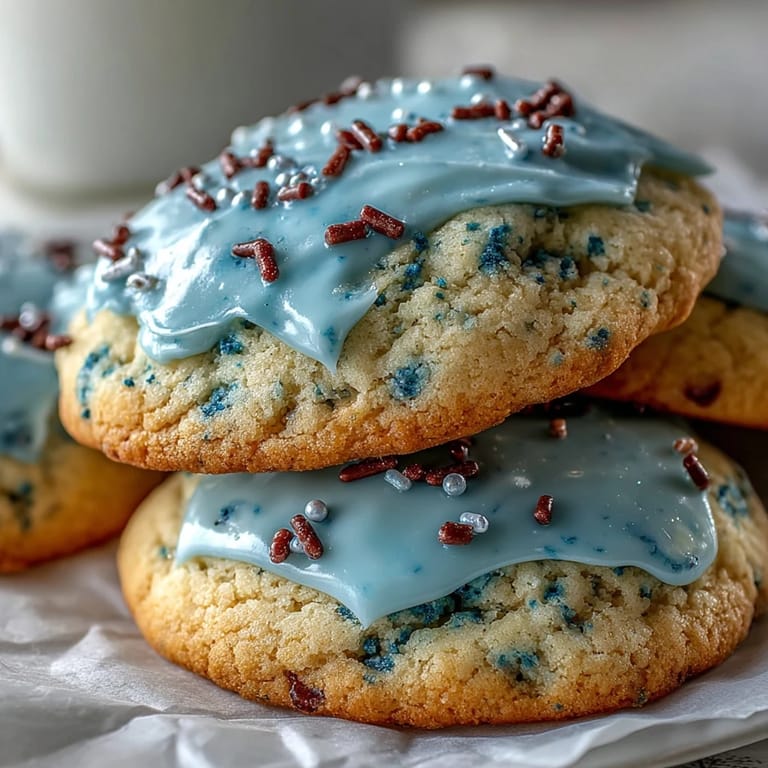
How Blue Is Too Blue?
I've learned that the first drops of gel coloring might barely tint the dough, but by the third drop, the blue can turn intense. Hold the bottle sideways and blend gently after each addition—it’s easy to go too far, and a softer shade suits the delicate look. The paler the blue, the more those cocoa speckles pop visually. If you do go bold, don't worry: the cookies still taste just as springlike.
Cookie Cutter Adventures
Egg-shaped cutters work beautifully, but I've used round cutters or even improvised with a small glass for whimsical results. Sometimes the shapes come out a bit wonky, but it adds character and charm—especially for holiday gatherings where not everything needs to be picture perfect. Just be sure to flour your cutter lightly between each dough slice to avoid sticking. The dough stays workable if kept chilled, even during marathon sessions (like when you're baking with kids).
Making the Perfect Speckles
The first flick of cocoa can feel intimidating, but the trick is dipping the brush lightly and aiming low over the cookie, not the entire tray. Rapid tapping gives fine speckles, while slower pressure creates bold spots. Whenever I get a runaway splatter, I just call it extra artistic flair.
- Lay down some parchment everywhere before speckling.
- Be patient—let the icing set so the speckles stay sharp.
- Store cookies side-by-side, not stacked, for a day to preserve the finish.
 Pin it
 Even after the cookies are gone, guests always ask for the recipe—there's something special about treats that look as delightful as they taste. Bake a batch and watch a room full of smiles bloom right alongside the spring flowers.
Recipe FAQs
- → How do you achieve the blue tint?
Blue gel food coloring is added to both the cookie dough and icing for a soft robin's egg hue.
- → What tools are needed for speckling?
A clean, stiff paintbrush or toothbrush is used to flick the cocoa mixture onto iced cookies.
- → Can almond extract be omitted?
Yes, almond extract adds a subtle flavor, but the cookies taste delicious without it.
- → How do you store the cookies?
Store them in an airtight container at room temperature for up to one week after icing dries.
- → Are these cookies vegetarian?
Yes, they contain butter and eggs but no meat or animal-derived gelatin.