 Pin it
 The week my best friend finished her degree, I found myself standing in the kitchen at midnight, suddenly convinced that a store-bought cake wouldn't cut it. I'd watched her stress through finals, saw her transform from overwhelmed to triumphant, and thought: this moment deserves something with gold on top. That's how this cake was born—not from a recipe I'd mastered, but from the urgent, joyful need to make something as special as she felt that day.
I remember sliding this cake out of the fridge right as her parents arrived, watching my friend's face when she saw it. There was this moment of pure, uncomplicated happiness before anyone even tasted it. That's when I understood: the best recipes aren't about technique or ingredients—they're about showing up for someone with something beautiful and homemade.
Ingredients
- All-purpose flour (2 ½ cups): The foundation of your sponge; make sure it's fresh and stored in an airtight container so there's no staleness lurking in your cake.
- Baking powder (2 ½ tsp): Your rise comes from here, and double-checking that yours hasn't expired is worth a thirty-second look at the tin.
- Salt (½ tsp): A pinch that you won't taste but absolutely will miss if you forget it—it makes vanilla taste more vanilla.
- Unsalted butter (1 cup for sponge, 1 cup for buttercream): Room temperature is non-negotiable; cold butter won't cream properly and your cake will be dense and sad.
- Granulated sugar (2 cups): Creates the fine crumb and provides structure; this is what makes the cake tender rather than rubbery.
- Eggs (4 large): They bind everything and add lift, but they must also be room temperature or the batter will break and separate.
- Pure vanilla extract (1 tbsp for sponge, 1 tsp for buttercream): Invest in real vanilla; the imitation version tastes chemical and flat in a delicate cake like this.
- Whole milk (1 cup): The liquid that keeps the sponge moist; room temperature milk integrates smoothly without shocking the batter.
- Powdered sugar (4 cups for buttercream): Always sift it to break up clumps, otherwise you'll have gritty buttercream no matter how much you beat it.
- White chocolate (6 oz melted for buttercream, 6 oz for drip): Buy quality chocolate with real cocoa butter; cheap white chocolate tastes waxy and doesn't melt smoothly.
- Heavy cream (2–3 tbsp for buttercream, ¼ cup for drip): This adjusts the thickness and creates that silky mouthfeel that makes buttercream taste luxurious.
- White chocolate crispy pearls or malt balls (1 cup): These become your gold balloons and add a delightful crunch against the soft cake.
- Edible gold spray or luster powder: The theatrical finale that makes people gasp before they even taste anything.
Tired of Takeout? 🥡
Get 10 meals you can make faster than delivery arrives. Seriously.
One email. No spam. Unsubscribe anytime.
Instructions
- Set up and preheat:
- Heat your oven to 350°F and take those three 8-inch pans—grease and line them with parchment paper. This step feels fussy but prevents the crusty edges that haunt you later.
- Mix your dry ingredients:
- Whisk flour, baking powder, and salt in a medium bowl until they're evenly combined. You're creating an even distribution of leavening so your cake rises uniformly.
- Cream butter and sugar:
- Beat them together for about three minutes until the mixture looks pale, fluffy, and almost cloud-like. This is where air gets incorporated, giving your cake that tender crumb.
- Add eggs and vanilla:
- Drop in eggs one at a time, beating well after each addition, then mix in vanilla. Each egg should fully combine before the next one goes in, or your batter will look curdled and split.
- Alternate flour and milk:
- With your mixer on low speed, add a third of the flour mixture, then half the milk, then another third of flour, then the rest of the milk, then the final flour. This alternating method prevents overmixing and keeps the batter tender.
- Divide and bake:
- Pour batter evenly into all three pans, smooth the tops, and slide them into the oven. Bake for 30–35 minutes until a toothpick inserted in the center comes out clean—don't overbake or your sponge will be dry.
- Cool your cakes:
- Let them sit in the pans for ten minutes so they set slightly, then turn them out onto wire racks to cool completely. This waiting period is frustrating but necessary—warm cakes are fragile and fall apart easily.
- Make the buttercream:
- Beat room-temperature butter until it's smooth and creamy, then gradually add sifted powdered sugar, mixing well. Once it looks like sand, pour in melted white chocolate, vanilla, salt, and cream, then beat until light and fluffy.
- Layer and crumb coat:
- Level your cooled cakes if the tops are domed, place the first layer on your serving plate, spread with buttercream, and stack the remaining layers. Cover everything with a thin crumb coat and chill for 30 minutes—this catches any crumbs so your final coat looks pristine.
- Apply the final frosting:
- Apply a thick, generous coat of buttercream to all sides and the top, smoothing it as neatly as you can manage. Perfection isn't required here; the drip hides minor imperfections beautifully.
- Make the white chocolate drip:
- Heat cream until it just barely simmers, pour it over chopped white chocolate, wait one minute, then stir until completely smooth. Let it cool to room temperature so it flows at the right consistency without being too runny.
- Drip and fill:
- Using a spoon or squeeze bottle, let the ganache cascade around the top edge of the cake, allowing it to drip down the sides in organic patterns. Fill the center with more ganache and smooth it gently.
- Create and arrange gold balloons:
- Spray your crispy pearls or malt balls with edible gold spray and let them dry completely. Insert toothpicks or thin cake wires into each one and arrange them in a festive cluster on top of the cake.
- Chill and serve:
- Refrigerate the cake until you're ready to serve, but always bring it to room temperature before slicing so the crumb stays tender and the buttercream isn't hard.
 Pin it
 What I didn't expect was how this cake would become a tradition. My friend texted me a year later asking if I'd make it again for her promotion, and then someone else asked if I could recreate it for their engagement party. A cake born from a single urgent, loving moment somehow turned into the thing people ask for when they want to celebrate something that matters.
Why Room Temperature Ingredients Matter More Than You Think
The first time I made this cake, I grabbed cold eggs from the fridge because I was in a hurry, and the batter looked grainy and separated almost immediately. I learned that cold eggs don't incorporate smoothly into butter and sugar—they create pockets and uneven mixing that show up as a crumbly, dense texture in the finished cake. Now I pull eggs out about an hour before I bake, and the difference is dramatic. The same goes for butter and milk; cold dairy makes the batter break apart, but room-temperature ingredients blend into something silky and homogeneous.
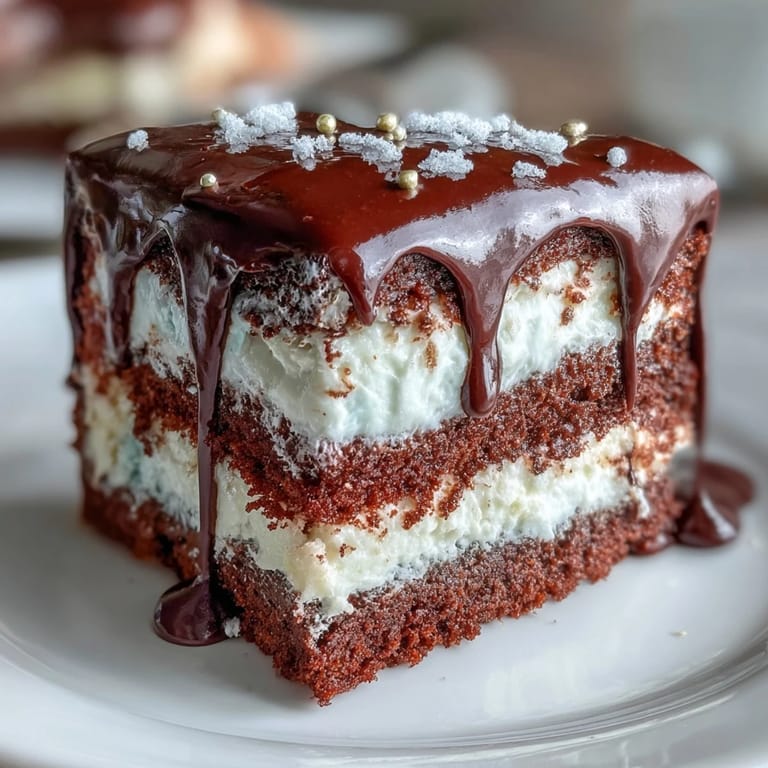
The Architecture of Layering Without Collapse
Stacking three layers of cake sounds terrifying until you realize the buttercream itself is what holds everything up—you're essentially gluing layers together with a frosting sturdy enough to handle weight but soft enough to spread smoothly. The trick is not to be stingy with buttercream between layers; a generous, even coat creates a seal and prevents shifting. I use an offset spatula and a turntable if I have one, but honestly, a lazy Susan works just fine. The crumb coat (that thin first layer) is your secret weapon because it catches loose crumbs so your final coat looks polished and professional.
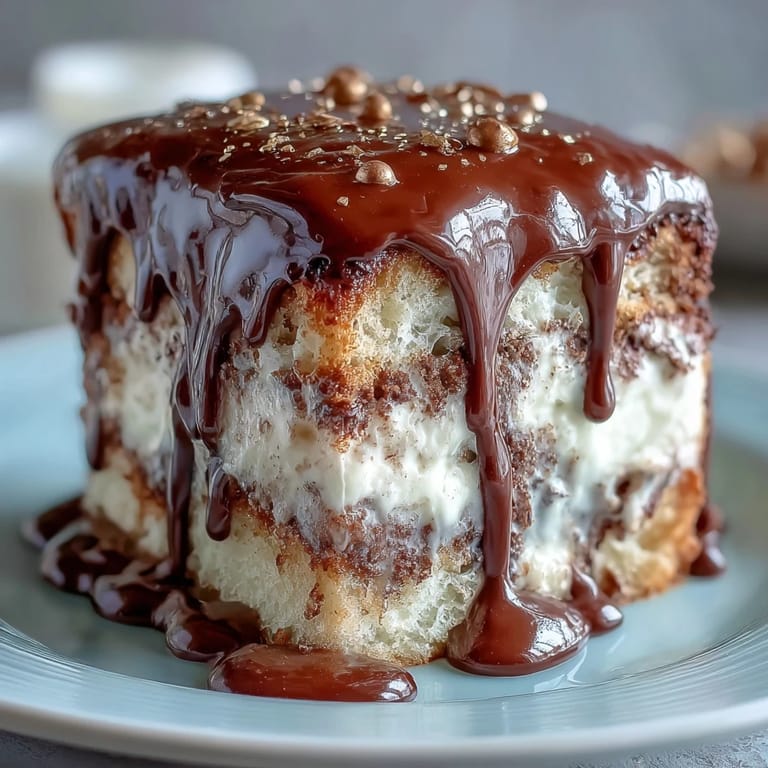
Making the Drip Look Effortlessly Dramatic
The white chocolate drip is the element that transforms this cake from pretty to absolutely stunning, and it's forgiving in a way that other decorations aren't. The ganache needs to be thin enough to flow but thick enough not to pour into a puddle—room temperature is the sweet spot, and you can always adjust by waiting a few more minutes if it's too thin or heating it gently if it's too stiff. I use a squeeze bottle for precision, but honestly, a spoon works beautifully too; those imperfect, organic drips look more artful than perfectly symmetrical ones anyway. Let gravity and the consistency of the ganache do the work, and you'll end up with something that looks like you've been decorating cakes professionally for years.
- Work slowly and let each drip find its own path rather than trying to control where it goes.
- A second coat of ganache in the center, smoothed slightly, creates a polished, expensive-looking finish.
- If a drip goes somewhere you didn't intend, you can gently scrape it away with a small palette knife while the ganache is still soft.
 Pin it
 This cake is a celebration in three layers, meant for moments when someone deserves to feel truly special. Make it, watch their face, and know that you've given them something no store could ever replicate.
Recipe FAQs
- → How do I achieve a smooth white chocolate drip?
Heat cream until just simmering, then pour over finely chopped white chocolate. Let sit for a minute before stirring until smooth. Cool slightly before dripping to control consistency.
- → What’s the best way to keep the vanilla sponge moist?
Alternate adding the flour mixture and milk when mixing batter to avoid overmixing. Also, avoid overbaking by testing with a toothpick near the minimum time.
- → How can I make the gold balloon decorations?
Spray white chocolate crispy pearls or malt balls with edible gold spray or roll them in gold luster dust. Insert toothpicks or wires once dry to arrange on the cake.
- → Can I prepare the buttercream ahead of time?
Yes, the white chocolate buttercream can be made a day in advance and stored in the refrigerator. Bring to room temperature and rewhip before using.
- → What tools are needed for decorating the drip and balloons?
A spoon or squeeze bottle is recommended for controlled drip application. Toothpicks or thin wires help secure the gold decorations on top.